▷ Data Validation in Excel | How to validate cells
La validación de datos en excel es una herramienta muy útil cuando queremos restringir o delimitar la información en cada una de las celdas de excel, entre un rango de números, una lista de datos ya sea números o palabras, también cuando quieres que los textos en cada una de estas sean mas específicos puedes añadir mensajes de entrada o mensajes de error personalizados para que la validación de datos sea mucho mas clara. Es importante conocer como aplicar esta herramienta para facilitar el manejo de los datos en tu empresa, proyectos o en el ámbito que deseas implementarlo.
Para entender la validación de datos de una manera practica utilizaremos una base en excel sobre los estudiantes que se van a matricular a diferentes grados escolares en el año 2022, para ello se requiere una información como teléfono, nombre, fecha, forma de pago, los cuales vamos a restringir y especificar según el criterio de validación mediante la validación de cada dato utilizando diferentes opciones de la herramienta Datos- Validación de datos en excel. Descarga la plantilla de excel con el ejercicio resuelto aquí:
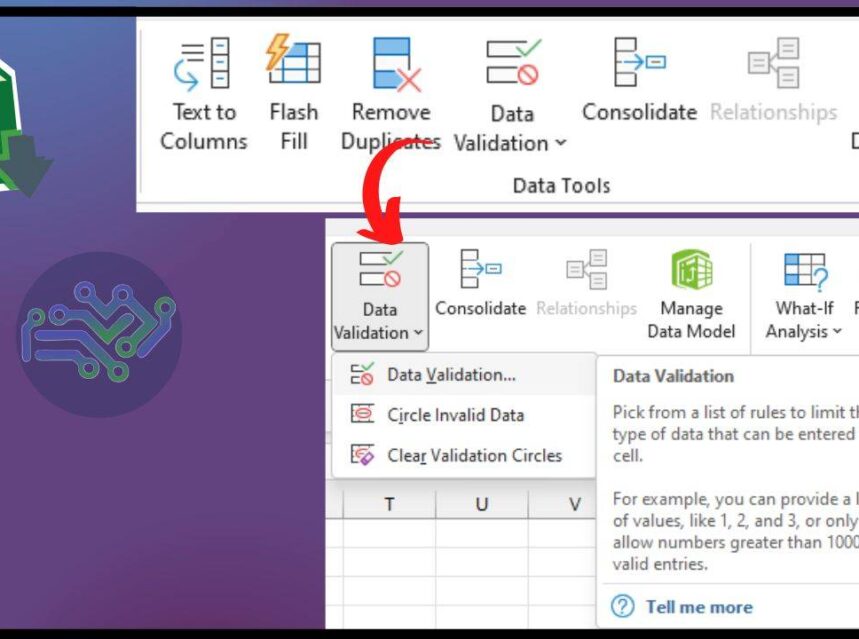
La ruta para validar datos en una celda de excel es la siguiente:
- Datos > validación de datos > se abre ventana de configuración.


Los criterios de validación de datos en excel son los siguientes:
- Cualquier valor
- Numero entero
- Numero decimal
- Lista
- Fecha
- Hora
- Longitud del texto
- Personalizada
Enlaces relacionados:
CRITERIOS DE VALIDACIÓN DE DATOS EN EXCEL:
CRITERIO DE VALIDACION: CUALQUIER VALOR
Se utiliza para validar en una celda cualquier valor que se le quiera dar a el dato ingresado, en el cual se puede añadir una mensaje de entrada o de error.
- Ir a la herramienta Datos > validación de datos
- Seleccionar configuración > Permitir: cualquier dato

- Seleccionar Mensaje de entrada > Titulo (escribir titulo) > Mensaje entrante (escribir mensaje entrante) > aceptar

- Finalmente se visualiza la información de esta manera para validar la información al momento de modificar la celda:

CRITERIO DE VALIDACION: NÚMERO ENTERO
- Ir a la herramienta Datos > validación de datos
- Seleccionar configuración > Permitir: Número entero > Datos: entre (se utiliza para elegir un rango de números especifico) > Mínimo: (escribir numero) > Maximo (escribir numero)

- Seleccionar mensaje de error > Estilo: ( Elegir Alto, Advertencia o Información) > Título: (escribir titulo) > Mensaje de error (escribir mensaje que quieres que aparezca) > aceptar

- Finalmente, el rango permitido para la información de la celda en este caso es de 2 a 4, si se digitamos el numero 5, 1 u otro diferente aparecerá el mensaje de error establecido

CRITERIO DE VALIDACION: LISTA
Este criterio permite seleccionar datos de una lista para delimitarlos en una celda, puede ser palabras, números o ambos :
- Ir a la herramienta Datos > validación de datos
- Seleccionar configuración > Permitir: Lista > origen: seleccionar el rango de datos de una lista > enter o aceptar

- En la celda se activa la opción para seleccionar solo los dato correspondientes a la lista anteriormente mencionada. También puedes ingresar un mensaje de entrada o mensaje de error siguiendo los pasos realizados en los anteriores criterios de validación.

CRITERIO DE VALIDACION: FECHA
Este criterio permite que la fecha tenga unas limitaciones en la celda como: fechas entre, no esta entre, igual a, no igual a, mayor que, menor que, mayor o igual que, menor o igual que. Estas validaciones son importantes para restringir el criterio de una fecha que sea diferente a cualquiera de los mencionados.
- Ir a la herramienta datos > validación de datos
- Seleccionar configuración > Permitir: Fecha > Datos: ( en este caso seleccionar «menor o igual que»)
- Ingresar en Fecha Final la formula : =HOY() «Esta formula sirve para restringir fechas mayores o iguales a la actual al momento de ingresarla en la celda

Al momento de ingresar en la celda validada una fecha que sea mayor a la de hoy, aparecerá un mensaje de error el cual puedes personalizar en la opción «mensaje de error».

CRITERIO DE VALIDACION: LONGITUD DE TEXTO
Este criterio restringe el texto que se ingrese en una celda ya sean números o caracteres. Por ejemplo, si queremos ingresar un numero telefónico de 10 dígitos, podemos restringir que solo sean 10 dígitos que se permitan, ni mas ni menos y se puede personalizar el mensaje de error para que aparezca al momento de no seguir con las indicaciones.
- Ir a la herramienta datos > validación de datos
- Seleccionar configuración > Permitir: Longitud de texto > Datos: igual a > longitud: (en este caso 10) > aceptar

Al momento de digitar mas o menos de 10 números en la celda validada, nos aparece un mensaje de error.

VIDEO: EJERCICIO VALIDACIÓN DE DATOS


